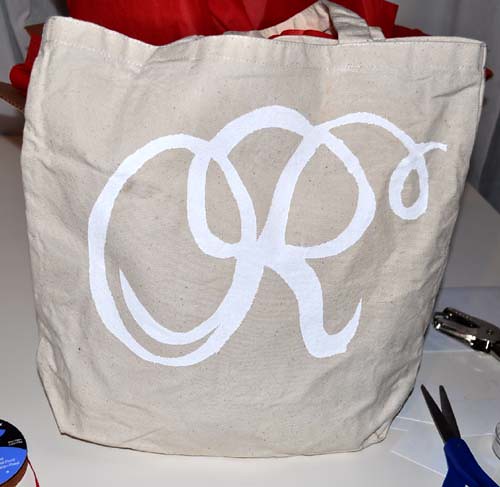
Often feel like items I sew or buy need a little something extra... I do know how to screenprint, but often what I want to do is a one-time project, so I need a simpler approach. My favorite go-to technique is using a Freezer Paper Stencil. Ridiculously simple and inexpensive, I recently used it to decorate a canvas bag I was giving my cousin with her birthday present inside.
Supplies:
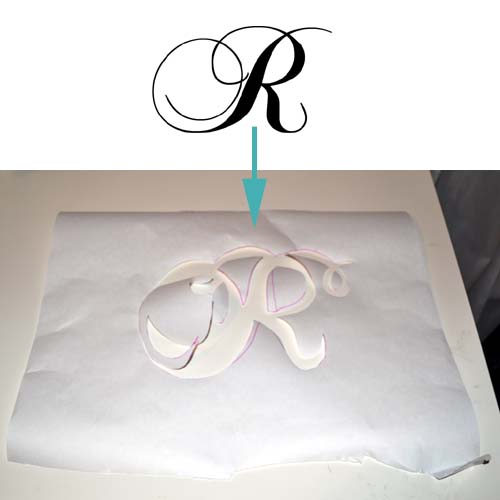
* Design you want to stencil onto the item - I chose to do her first initial, so printed out a big, fancy "R". (For this technique, pick something relatively simple in black & white)
* Freezer Paper - you can find it at your local grocery store near the plastic wrap and aluminum foil... but be sure to buy freezer paper, not waxed paper!
* Pen/ Pencil/ Marker
* Scissors or an exacto knife to cut out your design
* Fabric Paint
* Paintbrush (I like the foam brushes)
 Instructions:
1. Print out your design... here you can see the "R" I used (Chopin Script, for anyone who is interested!)
2. I place the printout under the freezer paper (shiny side down!) & trace around the edges with a pen/ marker. You want to trace around the outside edges of all printed (black, in my example) areas. The freezer paper has wax on one side (the shiny side), so you want to be sure that this is the 'back' of your stencil.
3. One I have the design on the freezer paper, cut on the lines: you'll end up removing the printed/ black areas, so that all is left is everything except the design you want to paint. The really neat thing about this approach is that you can have 'floating' areas, like inside the top of the "R" - with a traditional stencil, all pieces need to be connected, so this is a great perk of the freezer paper stencil.
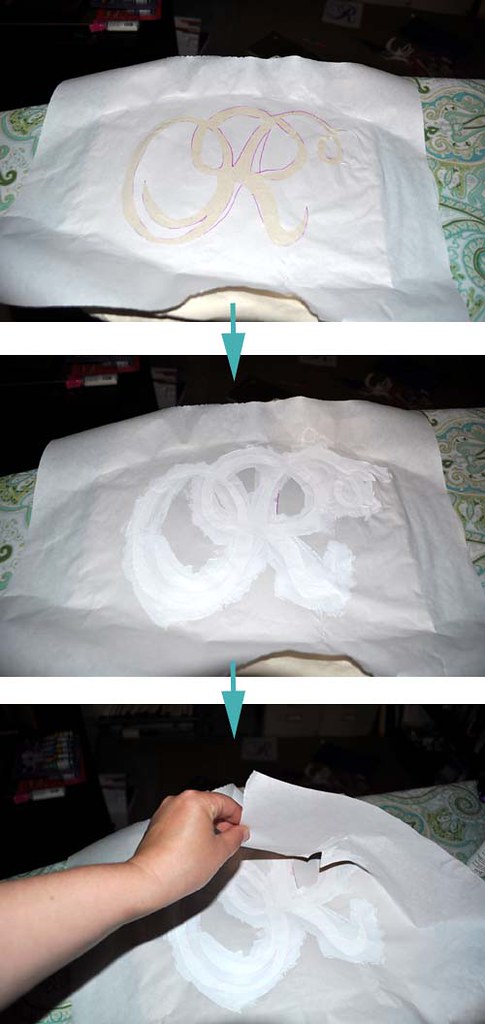
 4. Once the design is cut out, iron the freezer paper stencil you just created onto the fabric, using the warmest setting available for your fabric. Make sure that you place it exactly where you want to apply the design, and pay special attention to the edges to make sure that there is a good bond between the fabric and stencil.
5. Paint in the design! Paint over all the open areas (where your fabric is exposed) - I like to do two coats (letting them dry completely in-between)
6. Let the paint dry completely and then peel off your freezer paper stencil
Almost done... Read the instructions on your fabric paint for how to make it permanent - normally you need to heat-set (iron) the paint after its been applied to ensure it wont wash off. Then, admire your finished product!
 So cute... and so much better than the plain bag!


 Hi! I'm Nicole... I hope you’ll join me as I create, cook (not well – yet!), garden, decorate, entertain, shop, travel (sometimes just in my mind!) and just overall try to spread some joy through this tiny corner of the www.


