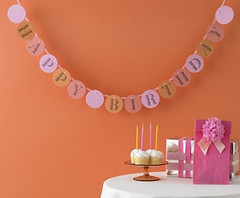
| I love this Martha Stewart birthday banner & often make my own version of it... It's easy to make & you likely have all the supplies on hand, plus it looks adorable & your guests will ooh & ahh! By doing it yourself you can also modify the colors & the message - this is also great for Congrats, Engagements, We'll Miss You - the possibilities are endless! |
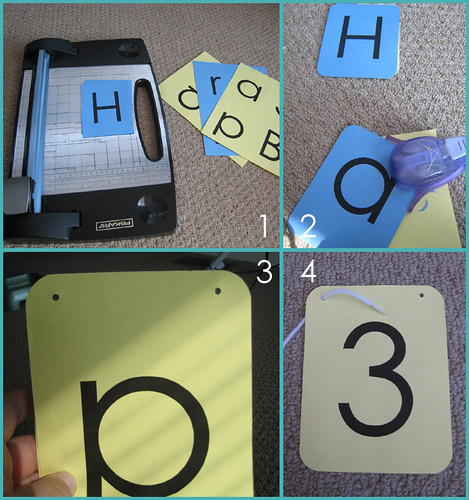
 I like to use colored paper (cardstock is best) & print on my home printer. It's easy, plus nice handwriting & fancy transfers aren't required! I start with a Word document & make a 2x2 table on each page. (You can use my starter template here.)
In this exaple, I am printing my letters on two colors... to make sure that the letters display in alternating colors, I put the 1st letter on the first page, then the 2nd letter on page 2, alternating back-and-forth as I spell my message. As you have more than 8 letters in your message, just keep adding pairs of pages.
Once you have typed out your message, it's time to print - load your paper into the printer in alternating colors (ex: I had a sheet of blue, then a sheet of yellow, then a sheet of blue...) & print your document.
1. After printing, cut out your letters. You can always cut circles and/or use fancy scissors, but I like to just cut them into 1/4 page rectangles using my paper cutter - you end up with four 4.25" wide by 5.5" tall rectangles.
2. This step is purely optional, but I think it makes a huge difference in how the end result looks - use a corner rounder to round the corners of your rectangles.
3. Punch 2 holes at the top of each letter. I like to punch one, and then lay it over my to-be-punched letters as a guide so that all the holes end up with the same placement & spacing.
4. String your letters! I typically use a craft yarn, but any ribbon, yarn, or string will work - just remember that anything that will stretch out or is too flimsy may sag or break. I also like to use a yard with a little texture to it - with a very thin or slippery string/ ribbon you run the risk of all your letters sliding towards the center of the sign. I also like to wrap a piece of tape around the end of my yarn to make a 'needle' that can be fed through the holes easier than a fraying end.
You do need to string your letters in order... if you're stringing from left-to-right, string in the order of your message. If stringing from right-to-left, add letters in backwards order.
Hang your creation & admire your handiwork!

Don't mind the beer in the picture... very classy....









 Hi! I'm Nicole... I hope you’ll join me as I create, cook (not well – yet!), garden, decorate, entertain, shop, travel (sometimes just in my mind!) and just overall try to spread some joy through this tiny corner of the www.


